Since version 3.3.0 Frontend Publishing Pro supports the free PayPal Addon downloadable from the addons section. This addon grants you the ability to accept PayPal payments for posts. This short guide will explain how it works and how you can set it up on your website.
How It Works
The addon introduces a new tab in the post list interface. The title of this tab is “Awaiting Payment”.
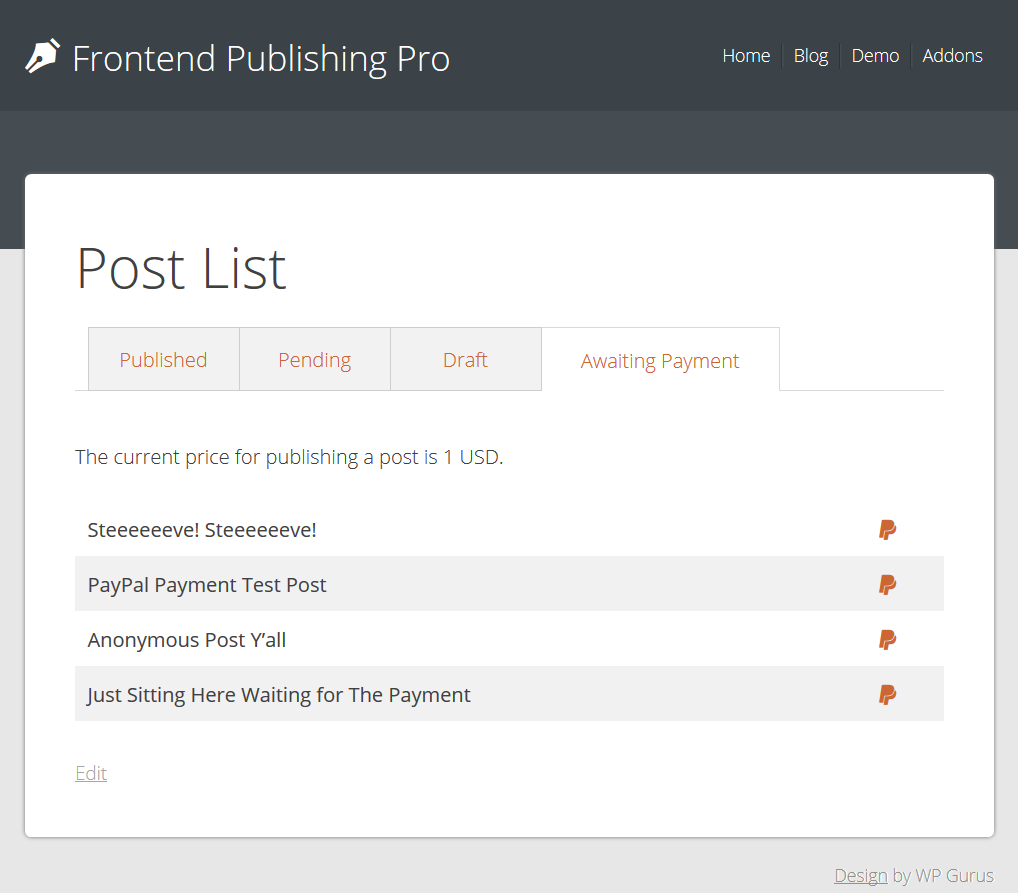
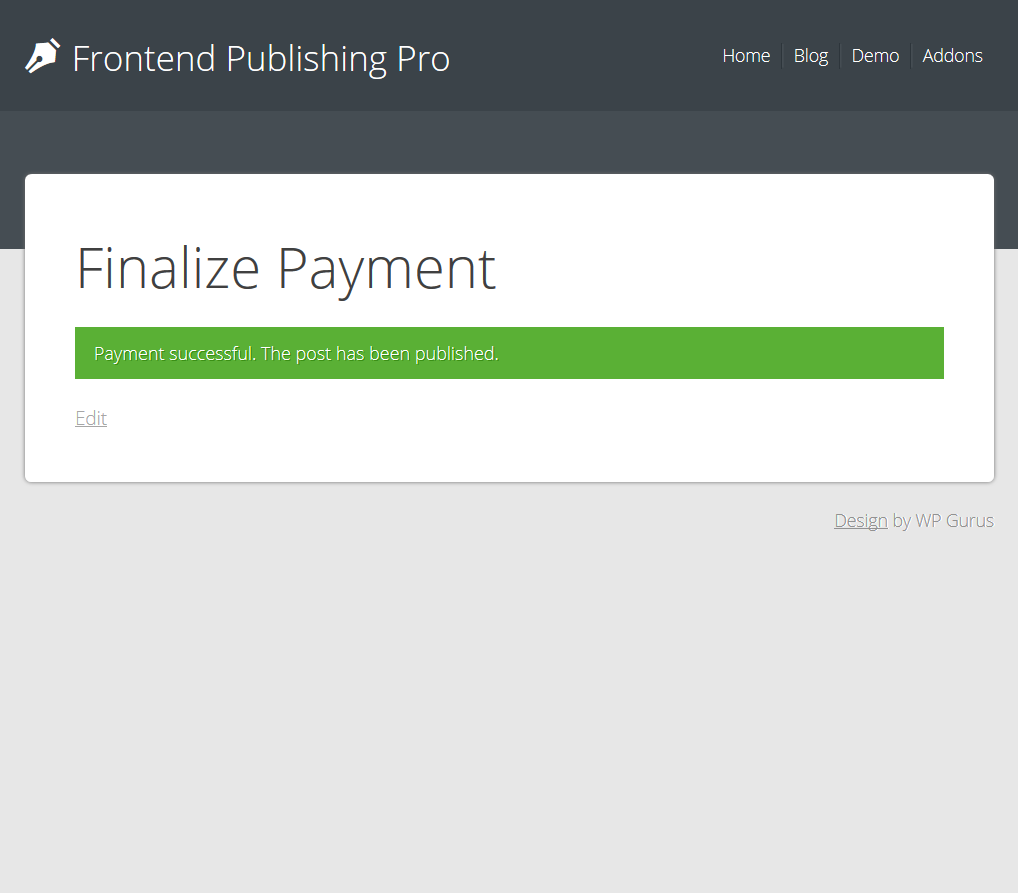
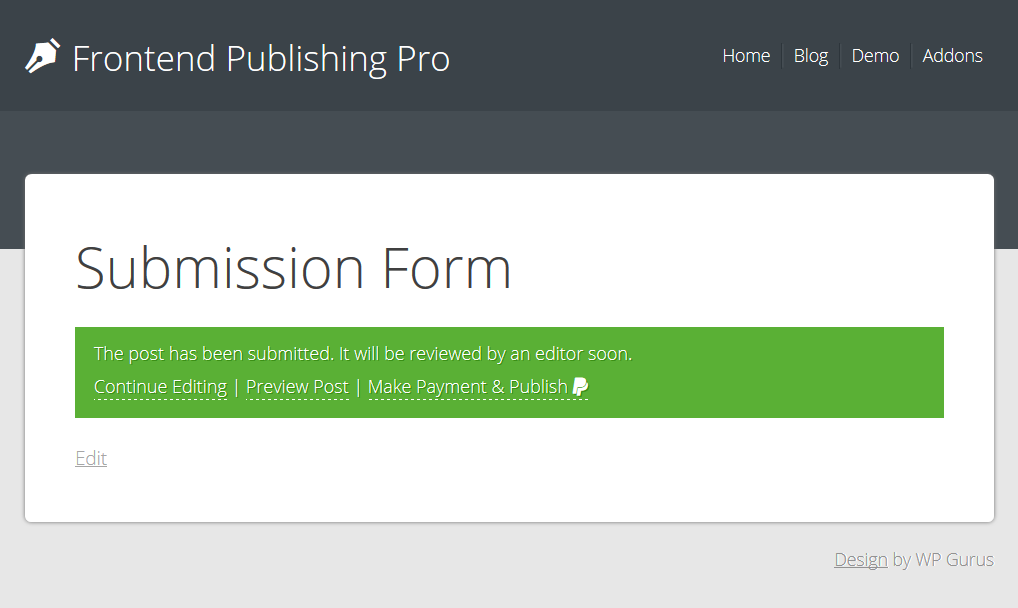
As the title of this tab suggests, when a post is in the awaiting payment state, it appears here. In front of each post is a small PayPal icon. Clicking this icon initiates the express checkout process and takes the user to PayPal.com for payment. Once the payment has been authorized on PayPal.com, the user is brought back to your website where he/she is shown a button for finalizing the payment.

Clicking this button finalizes the payment and publishes the post.
Moving a Post To “Awaiting Payment”
There are two main ways you can move a post to awaiting payment.
Method 1. When you want to approve each post before it goes to awaiting payment
In the WordPress admin area navigate to the page that lists all the posts. From the links on the top (All, Published, Pending etc) click on “Pending”.
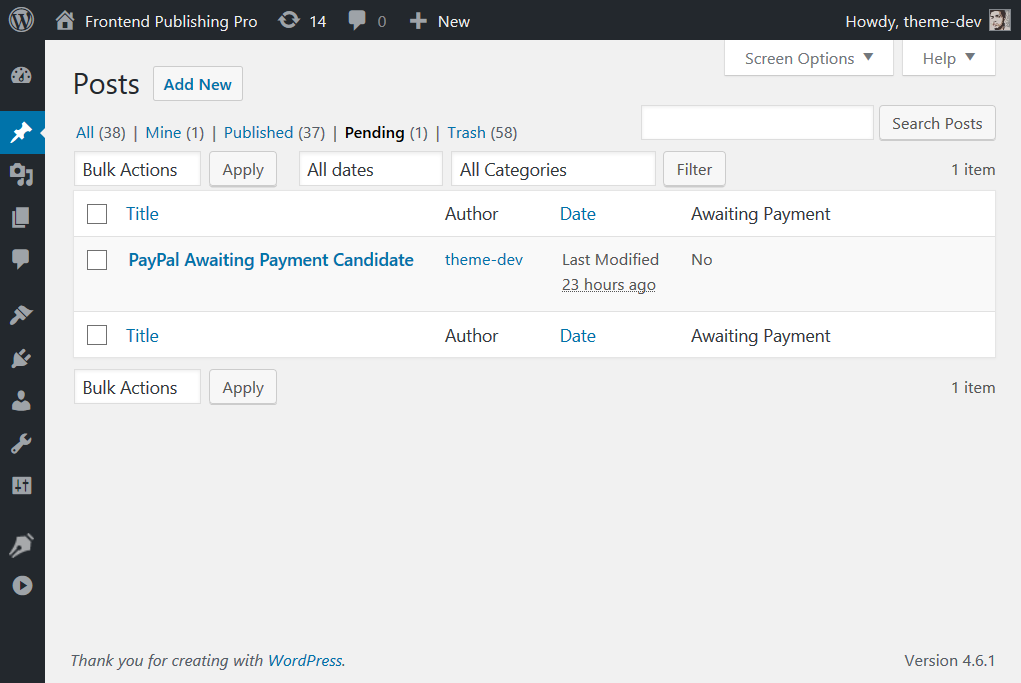
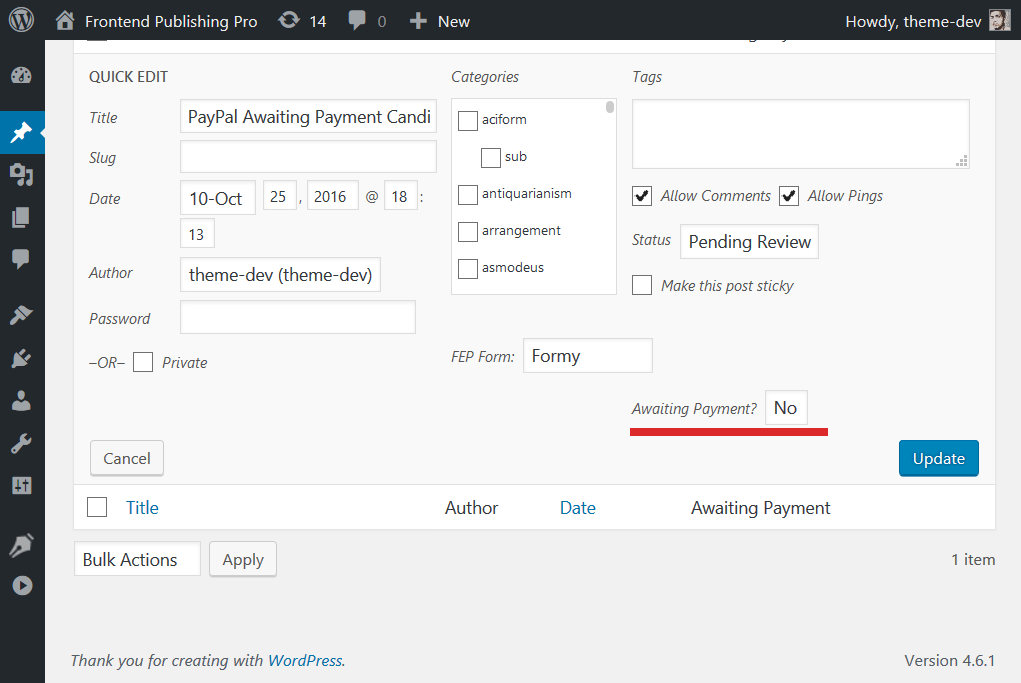
Here you can quick edit any post, or bulk edit a bunch of posts to move them to “Awaiting Payment”. Please note that the quick edit fields and the new column displaying the status are only visible in the pending section.
Method 2. When you want the posts to go to awaiting payment automatically and get published upon successful payment
If you want everything on autopilot then you can use this second method. Go to the “Payments” tab of the form and select some roles for which you would like posts moved directly to awaiting payment without manual approval.
When users belonging to these roles submit a post, the post will automatically go to awaiting payment. They will also be able to make the payment from the form itself.
Here’s a flowchart that summarizes everything covered so far:

How to Set Up PayPal Payments
The addon introduces two new tabs on the settings page namely “PayPal” and “Payments”.
Here is a short description of the settings available in the new tabs:
PayPal Tab
API Username, API Password, API Signature: These credentials can be obtained from the PayPal website here.
Finalize payment page: The page where you would like the finalize button to appear. This is the page that the user will be redirected to once he or she has authorized a payment on PayPal.
Payment cancelled page: This is the page that will be shown to the user if he/she cancels the payment on PayPal.
Currency Code: The currency that you would like to use for payments.
SandBox mode: PayPal allows you to create dummy accounts and use their API credentials for testing. It is extremely important that you test your setup in sandbox mode before making it available to your actual users. You can create sandbox accounts here.
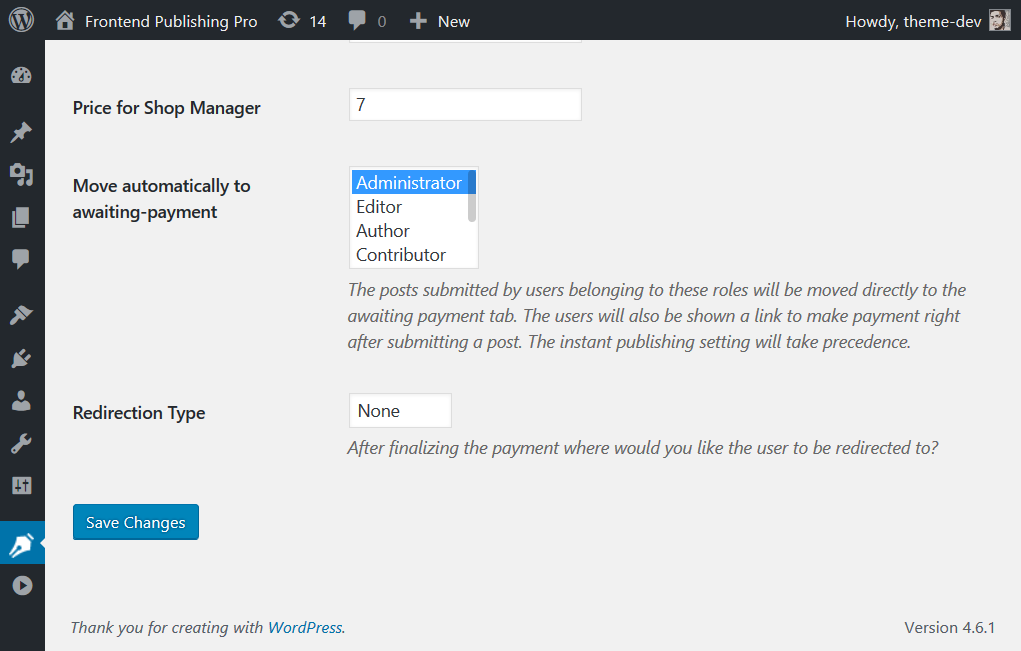
Payments Tab
Prices: For each user role defined on your website you can enter a different price in the Payments tab.
Move automatically to awaiting-payment: Posts submitted by users belonging to the roles selected here will be moved directly to the awaiting payment tab. The users will also be shown a link to make payment right after submitting a post.
Redirection Type: You can redirect the user to the published post or a custom URL after the payment has been finalized.
In addition you will notice a “Payments” tab when you start editing a form. In this tab you can override the default payment settings.
Enabling Payments For a Form
You can enable or disable payments for each individual form. For this go to the settings tab on the form edit screen and check the “Enable Payments” option.
If you have any questions please let us know.